Installation
How Cuplock Falsework Goes Up: The 6-Step Erection Sequence
22 Aug 2026
Installation
22 Aug 2026
Cuplock falsework looks complex once it's standing, but it goes up in a strict, repeatable sequence. This is the procedure our crews follow for a basic supporting grid of four standards and beams — and it's the same logic however large the deck gets.
Adjacent supporting grids are added the same way, with primary beams and infills continuing until the required area is covered.
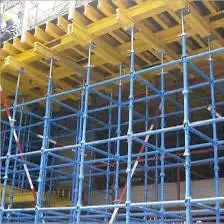
Each standard carries a joint cup every 0.5 m of height. The ledger's forged blade end drops into the bottom cup, and the drop-forged top cup locks over it — no loose nuts and bolts at the connection. That's why a trained crew can erect and strike cuplock structures significantly faster than tube-and-fitting equivalents, with fewer components to lose on site.
Striking follows the erection sequence in reverse — and because primary beams and infills can't fall to the ground on their own, dismantling stays controlled. After striking, components are removed manually, sorted and stacked for the next use.
Planning a slab or structure that needs falsework? See our Cuplock system or send us the drawings — we'll propose the grid, the quantities and the programme.
Our team answers these on real sites every week — ask us directly.